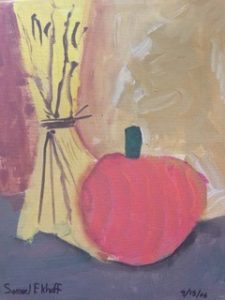
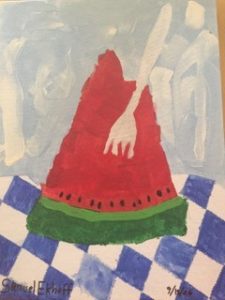
Now it’s time to paint!
- Choose an appropriate size brush for the first area to be painted. Dip the brush into the paint, and then carefully fill the space designated for that color. Re-dip often.
- Blow-dry each section before continuing on to a different color –this prevents colors from bleeding into their neighbors or smearing with an elbow.
- Rinse the brush carefully by tapping and swishing it intentionally on the bottom of the water cup and touch the wet brush to the paper towel before dipping it into a new pigment.
- Freely turn the canvas to better reach new areas.
- I like to tell students that you cannot make a mistake when painting. The most careful artist makes faulty strokes sometimes. When we accidently slip outside the design, just (1) stop, (2) blow dry the area and (3) repaint it.
- Sometimes it takes more than one coat to completely cover the canvas so that the white canvas or an unwanted color is not seen through a new layer. Blow-dry the first layer, then paint a second, third, or fourth layer, blow-drying between each, until the area is opaque (a solid, dense color).
- Sometimes a detail is best added after a base color is applied. For instance, it is easier to paint the whole football brown, let it dry and then paint the white stitching on top of the brown basecoat. In the same way, it’s easier to paint the whole flower purple, and then paint the yellow center on top of the dry purple basecoat. Sometimes I redraw the details on a painted object so kids have new guidelines for the details, and sometimes we free hand the details.
- When it comes to backgrounds, I encourage my students to try mixing a bit of a second color into the basecoat while it is still wet. It adds richness and dimension.
Those who feel adventurous may try adding some shadows and highlights (lights and darks) to give the illusion of a 3-dimensional shape. These details may be blended at the edge of an object while the base color is still wet or by drying the basecoat and adding a transparent (waterier) pigment at the edges or under an an object or shape.
When painting with little ones, 4 – 7 years
Stay close and attentive to intervene when the paint or brush is out of control. Help them completely rinse one color out of the brush and remove excess water before switching to new colors. Sometimes I use a black sharpie to outline the details of the painting after it dries. But the painting usually looks best left a little messy – so cute.
Brush care
Brushes are an investment for sure, but when they are protected and kept clean, they last for years. Never leave a brush loaded with paint in the open air. Simply drop it into the water cup to keep the paint from drying in the bristles and ruining it. To clean brushes, I place a few drops of dish liquid in the palm of my hand and work the brush bristles into the soap by tapping the bristles against my palm and working them back and forth. Then I rinse the brushes with clean water, taking care to notice stubborn paint lodged against the metal mount of the brush. When the brushes rinse clear, I reshape the damp bristles with my fingertips and set them on end in a cup or jar to dry.
This fine art, kid-tested painting technic from my kid-tested art room is fairly manageable – even for those Moms who aren’t very artsy. Have fun! I would love to see a photo of the finished paintings from your family’s “art room.” Kids’ art makes me smile.


Leave a Reply