Do Your Teens Do The Right Thing On Social Media? by Belinda Letchford

title-teens-right-thing-social-media


Belinda Letchford is a Contact Mom in the Growing Families Australia parenting ministry and author of the blog Live Life with Your Kids.  In today’s technological world, Belinda brings up a conversation every parent should have with their tweens and teens.


I’m a big advocate for letting our teens be on social media. I think it is here to stay, and if our kids don’t learn how to do it well while they are in our home, and under our guidance, then when they get into the big wide world on their own, they will try it for sure, and undoubtedly make mistakes as they learn.

But I have some concerns about the words we use to teach them to use it well.

I recently read an article on “Burn Notes”; apparently, technology has made a way for things to disappear off the internet. We can go incognito on our browsers so our history isn’t recorded, and we can use social media apps where what we say is deleted once it is read by the intended recipient.

What struck me when I read this article is that teens are thinking that because of this technology what they have to say has no consequence – no-one will know. It seems as if teens are saying because there is no consequence I can say what I want – I can show what I want – and it will be okay.

This rings alarm bells for me as a parent – have I taught my kids to consider the consequences as the benchmark for right behaviour?  (I hope not)


The consequence of Wet Cement

One of the restraints that parents use to teach their kids about online behaviour is the idea of wet cement – the idea that your actions are like footprints in wet cement – you cannot erase them.

Though this has some merit – and on some social media this is still the case – it doesn’t get to the heart of the matter. Talking about wet cement, which is simply telling our kids to be guided by negative consequences – has a shock factor, it raises concern and potentially caution but technology is taking us further away from the place where this issue is convincing. If technology advances to the point where comments are truly deleted – if the wet cement factor is taken away – how do parents teach their kids to be safe, respectful and responsible?


Social Media is just a big Party

Social Media is social – and though parents may struggle to see how it is real socialising, to our teens it is very much a way of connecting and relating to their friends, old and new.

I see social media like a big party, a very big party – and we go to parties where we don’t know everyone, and we make new friends at a party.  This concept of social media being a big party can help us adjust our understanding of how the world is changing with social media and how our kids are taking it and running with it.

Because it is social, we need to teach our kids to act social – appropriately.


Sending our kids out the door to a party and reminding them to do the right thing by remembering that actions have consequences is a valid parenting conversation. I believe though that it falls short – there is a subtle message that we are saying if there are no consequences, you can do stupid things.  Of course parents don’t mean this, but I wonder what teens hear?

The key message we should be telling our teens is: Wherever you are you are to be respectful and responsible. Wherever you are, you are to act in keeping with your values. 

Teaching our kids these two principles will guide them regardless of the social contexts they find themselves in, regardless of the peer pressure to behave a certain way, regardless of the trends and fads of their generation.


Respect is always the Standard

The standard for all social situations is to respect yourself and love others. The issue of respect does not change for this new social setting of online social media.

When our kids use respect and love as the standard (as opposed to fear of consequences) it enables them to be social appropriately regardless of the situation. Their behaviour online becomes an issue of doing the right thing – out of a desire to do the right thing.

Teaching our kids to respect themselves

Respect is about knowing something is precious, has worth.  We respect other people because they are special, unique, made by God, loved, they are valuable.  And we are too.  We have to be able to teach our kids that while they need to respect others they also need to respect themselves.   They are just as valuable to God and others as the next person.

Our children need to know that they are precious in the sight of God.  That God made them, loved them, bought them with his son’s blood, has a purpose for them and wants a relationship with them.  When we see ourselves this way it shapes the things that we do or let be done to our self.

Teaching our kids to love others

For some reason social media tends to make people think just about themselves – but no social situation is ever just about one person.  There are also at least one other to be social.  We need to teach our teens, that when they go online, they need to consider the other person – just as if they were in the room face to face.

title-teens-right-thing-social-mediaRespecting ourselves and loving others is the foundation for any healthy relationship.  As we teach our teens to deal with the variety of social media interactions we need to make sure that it is these two things that come to their mind – it needs to be these two standards that direct their actions.


Social Media isn’t the bad Guy

Social media is just one place where our kids go to interact with people. They may also catch up with friends at school, sport events, activity clubs, work, church – in each of these contexts our teens will be creating social habits. I think it wise of parents to not make social media a different issue than any other social situation your kids face. Social is social – and at the heart of all social interaction is a relationship.

Part of the false thinking that teens get caught up in is the idea that I can say what I want because no-one will know (Burn Notes, or Snap Chat etc) but that isn’t true. The person who read the comment, they know. And if it was a message taking advantage of the short-lived nature of the technology – then it probably hurt, it was probably suspicious and probably wouldn’t have been said in a room full of other people.

It reminds me of the snide or niggly comments that siblings often make to each other – just under their breath – enough for the other sibling to hear, but not clear enough for mum and dad to hear.  They know it is mean – it was intended to be mean – and yet delivered in such a way that they hope they fly under the radar and avoid detection by the parents.

Once again – it is a heart issue. What is in the heart of a sibling when they would do such a thing?  What is in the heart of a teen when they do something similar online?  In both situations the heart attitude is mean or rude – there is a lack of valuing the other person.

So social media isn’t the bad guy – our kids hearts are.  Being social is a heart issue – therefore we need to give a heart reason for appropriate behaviour. Don’t teach your kids to act based on consequences – get them to consider the preciousness of the other person, and their own personal value system.


Special thanks to Belinda Letchford for allowing us to share this article from her blog, livelifewithyourkids.com.

The Value of Preparation and Training at Home by Beth Blunk

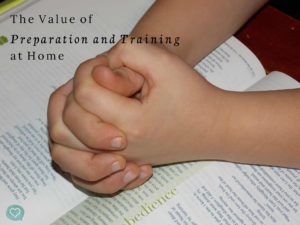
selfcontrolHere’s the scene:  Dad takes 2-year-old twins to a public family bathroom for the girls to go potty while Mom is busy nursing the baby.  While helping the second twin, he turns to check on the first one who was supposed to be waiting to wash her hands.  What he sees may be an all-too-familiar sight – the paper towel roll that was low enough for her to reach is now flowing to the floor, piling up in a puddle at her feet and she is giggling with delight at her new found toy.  Behaviors like this aren’t unusual with young children.  What one toddler doesn’t think of, chances are, the other one will.  But these parents have been working on self-control hands at home and quickly Dad calls out, “Evi, get your self-control hands,” using his voice of authority.  What happens next confirms the promise he’d heard in our Toddlerhood Transitions class:  if you will practice self-control hands during times of non-conflict at home, then during stressful times when your child is out of control, whether at home or in public, you can call her to your established standard and she knows what you are asking her to do.  Evi stopped pulling the paper towel roll and put her hands together and smiled at Daddy.  It was too cute!  He pulled out his phone to snap a picture to share with me, “It works!”  His doubts were erased by the evidence at hand.  Small victories like this fuel parents’ determination and perseverance to continue with the hard work of training character in their children.

Self-control hands are a beautiful tool parents can use to diffuse the energy, curiosity, and lack of self-control of the toddler and preschool years.  When children clasp their hands together and focus their gaze on their hands, the energy and emotion that flows from their hearts and minds begins to calm down.  It works for adults too.  Have you told your child to, “Calm down,” but he doesn’t understand what that looks like?  Here is a way you can teach him:

Teach and train in times of non-conflict.  Any training you want to do is best done at home and at times when your child is not in conflict with you.  Wise parents realize the need for training before they need it, or more often, they see a misbehavior they don’t like and make a plan to train a virtue in its place.  Maybe during a meal or after your child is finished eating, you can put his hands together and tell him, “These are self-control hands.  Good job!”  At first it may be only 3-5 seconds before he pulls away.  Chances are you will need to lovingly cup your hands around his in the beginning.  Praise his effort, even if he resists you.  You are teaching him what “self-control hands” look like and your praise signals that this is a good thing.

The power of practice.  Have you tried to teach your child a skill and decided it doesn’t work for your child?  Let me encourage you to try again.  Galatians 6:9 encourages us to “not become weary in doing good, for at the proper time we will reap a harvest if we do not give up.”  While some children will easily submit to your attempts to establish boundaries in their lives, most will push back.  All young children need time, practice, and our patience to become consistent at these skills.  Practice self-control hands once or twice at meal time and then extend it to other times and places, like after a diaper change, in the grocery cart, during a story time, and more.  Keep your voice pleasant and calm.  In time, you will be able to ask him to show you his self-control hands and he will clap his hands together and smile –  expecting your smiling face of approval and words of praise.  What started as a few seconds grows to 15 – 30 seconds.  All this is training time and practiced when the child is already calm.  With deliberate practice, some toddlers and preschools can extend this skill to 5 minutes and more, but you don’t need that long to be able to use this skill like the dad above did.

Applying the skill in new situations.  In time, you will be able to face your child’s emotions or misbehavior and use your words to call them to self-control.  Now he knows what you mean!  You’ve practiced it at home.  He puts his hands together and looks at you.  Your heart soars.  It works!  He is growing in self-control.

The power of praise.  Praise him again for using his self-control hands, even if he is still whining or crying.  If you need to, cup your hands around his and use a calm voice.  Praise him again when he begins to calm down.  Say something like, “Good job, you are getting your self-control.”  Don’t expect perfection.  This is a new skill and he will perfect it with practice.  Consider that he is exercising a “muscle,” and practice and praise will cause it to grow.  Your praise motivates him to keep doing something that is hard right now.

Your child’s self-control in public is a reflection of Christ’s character.  We used to sing the children’s song, This Little Light of Mine.  When we let our light shine, others can see Jesus, like in the young family in one of our classes.  Another dad told me the story of their visit to the library shortly after teaching this skill at home.  They were checking a stack of books out at the counter and his 2-year-old was trying to grab the books to put in his bag before the librarian was finished.  Dad patiently directed his child to use his self-control hands and wait until the librarian was finished with the books.  His child immediately put his hands together as they had been practicing at home and quietly waited.  The librarian was impressed and praised the child and the father.  This dad came back to class with new confidence that parenting is not a mystery, and he can teach his son valuable lessons.  Do not despise the day of small beginnings (Zechariah 4:10) as you prepare and train your child at home.  You can do it!


Beth Blunk is a Certified Contact Mom with Christian Family Heritage and along with her husband, Ed are Growing Families International leaders in Raymore, MO.


the-value-of-prep-and-training

Kids’ Kitchen Table Painting Lesson for the Art Deficit Mom by Susan Ekhoff, Part 2

kids-kitchen-table


Now it’s time to paint!

  • Choose an appropriate size brush for the first area to be painted. Dip the brush into the paint, and then carefully fill the space designated for that color. Re-dip often.
  • Blow-dry each section before continuing on to a different color –this prevents colors from bleeding into their neighbors or smearing with an elbow.
  • Rinse the brush carefully by tapping and swishing it intentionally on the bottom of the water cup and touch the wet brush to the paper towel before dipping it into a new pigment.
  • Freely turn the canvas to better reach new areas.
  • I like to tell students that you cannot make a mistake when painting. The most careful artist makes faulty strokes sometimes. When we accidently slip outside the design, just (1) stop, (2) blow dry the area and (3) repaint it.
  • Sometimes it takes more than one coat to completely cover the canvas so that the white canvas or an unwanted color is not seen through a new layer. Blow-dry the first layer, then paint a second, third, or fourth layer, blow-drying between each, until the area is opaque (a solid, dense color).
  • Sometimes a detail is best added after a base color is applied. For instance, it is easier to paint the whole football brown, let it dry and then paint the white stitching on top of the brown basecoat. In the same way, it’s easier to paint the whole flower purple, and then paint the yellow center on top of the dry purple basecoat. Sometimes I redraw the details on a painted object so kids have new guidelines for the details, and sometimes we free hand the details.
  • When it comes to backgrounds, I encourage my students to try mixing a bit of a second color into the basecoat while it is still wet. It adds richness and dimension.


pumpkinFor the adventurous

Those who feel adventurous may try adding some shadows and highlights (lights and darks) to give the illusion of a 3-dimensional shape. These details may be blended at the edge of an object while the base color is still wet or by drying the basecoat and adding a transparent (waterier) pigment at the edges or under an an object or shape.

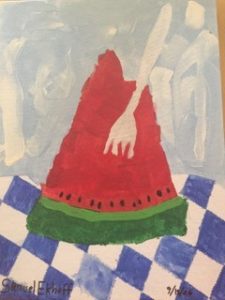
 watermelon

When painting with little ones, 4 – 7 years

Stay close and attentive to intervene when the paint or brush is out of control. Help them completely rinse one color out of the brush and remove excess water before switching to new colors. Sometimes I use a black sharpie to outline the details of the painting after it dries. But the painting usually looks best left a little messy – so cute.


Brush care

Brushes are an investment for sure, but when they are protected and kept clean, they last for years. Never leave a brush loaded with paint in the open air. Simply drop it into the water cup to keep the paint from drying in the bristles and ruining it. To clean brushes, I place a few drops of dish liquid in the palm of my hand and work the brush bristles into the soap by tapping the bristles against my palm and working them back and forth. Then I rinse the brushes with clean water, taking care to notice stubborn paint lodged against the metal mount of the brush. When the brushes rinse clear, I reshape the damp bristles with my fingertips and set them on end in a cup or jar to dry.


This fine art, kid-tested painting technic from my kid-tested art room is fairly manageable – even for those Moms who aren’t very artsy. Have fun! I would love to see a photo of the finished paintings from your family’s “art room.” Kids’ art makes me smile.

Kids’ Kitchen Table Painting Lesson for the Art Deficit Mom by Susan Ekhoff, Part 1

kids-kitchen-table


Kids love to paint, but most moms hate the thought of letting them. It’s too messy and too expensive and too hard to teach. If you are not a fan of letting your kids loose with an art project that involves paint and brushes, may I share a pretty simple idea that could have some pretty dazzling results? It’s based on the simplicity of color books and crayons, and the common skill of coloring within the lines. But your kids get to choose their own subject matter and paint within the lines instead.

I’ve used this format in my art classes for years and have found that most children (and their parents) are very proud of the finished art. You may even want to treat yourself to a painting of your own! Even Moms get to have fun sometimes : )


Supplies

  • Acrylic paints in a variety of colors

Wait until you see what your child chooses for subject matter and then head to an art supply store and pick up the colors that you will need. I often use the flip-top acrylic paint manufactured by Ceramcoat, Apple Barrel or FolkArt from Hobby Lobby or Michaels. If you are painting for the first time, the basic colors include the following: red, blue, yellow, green, orange, purple, turquoise, white, black, and brown. Mixing any two of these produces most of the other colors.

  • A canvas

An inexpensive choice is canvas covered cardboard – called canvas panel board, but some kids like the look of a real canvas stretched over a wooden frame. For beginners a 9 x 12 canvas may be a good in-between size. Large canvases take more perseverance to cover with paint corner-to-corner. Small canvases cause the subject matter to be so small that small hands have difficulty controlling the paint.

  • Brushes

Do not go cheap on this part. It is impossible for kid-quality brushes to make a defined brush stroke and the bristles fall out and embed in the paint. Painting with an inferior quality brush is like trying to brush your hair with a broom. If an “economy package” of 10 brushes costs $8.95, you may want to steer clear and shop on. Quality brushes cost $5.00 – $20.00 each. For children’s projects I usually go with the middle to low end price and wait for a 40% off sale!

A good first set of brushes for the family might be a set of 3 – 4 brushes of various sizes. I like flat square bristles best but use round ones too. (See photo)brushes

  • Carbon paper

This is the old-fashioned stuff that people once used to make duplicate copies on a typewriter. It is available online and at office supple stores. Ten sheets of 8 ½ x 11” carbon paper have taken me through 30 years homeschool and art classes. Very handy

  • A smock

This is very important because paint stains clothes. An old adult size T-shirt or button-up shirt reversed to button up the back works great.

  • An old plastic cup or jar for water
  • A folded paper towel

This absorbs the excess water from the brush as it comes from rinse water.

  • Paper plates

These are handy disposable palettes.

  • A cover for the table

For my art classes I use an old plastic table cover. Newspapers would also work.

  • A blow dryer! (like you use to dry your hair)

This is not an absolute necessity, but I use one in all my art classes. That easily accessible, hot, strong air dries acrylic paint very quickly, indeed (usually within a minute or two), so that children can move on to a new color.


Variations

I have also used this technique with watercolor paint on good quality watercolor paper, and acrylic paint on a wooden surface and been pleased with the final product.


Instructions

  1. Decide what to paint

Have your child draw a simple outline of what she wants to paint. For instance, if your son likes football, he may enjoy painting a football on green turf. If it’s autumn, perhaps your daughter would like to paint a fall leaf or a pumpkin. Sometimes I choose the subject matter based on what we are studying in school. Many children draw with confident freedom. Even a four-year-old’s drawing of a house, flower, sun, or tree can translate into an adorable painting. I still display my children’s early paintings. They are adorable.

Think coloring-book simple. Landscapes and portraits are more difficult for young artists to paint than a single item on a plain, solid background (still life). The drawing should be about the same size as the canvas, so it transfers easily to a painting. But if the drawing is smaller than the canvas and you want to use it, some copy machines will enlarge an image.

If your child has an idea of what to paint, but he’s not sure how to design it, do a little research on Google Image. (Be careful here! You never know what lewd image may appear before your horrified eyes!) Discover what other photographers and artists have created. Looking at clipart may also be helpful. Choose several ideas that spark your child’s imagination. I like to print the best one or two of these to have on hand as my child paints. Again keep the ideas very simple.

If your child doesn’t like to draw, you could just let him choose a page from a favorite coloring book instead. Sometimes I sketch the idea for my children.


  1. Practice with crayons or markers.

Before breaking out the more expensive and messy art supplies, it’s a good idea to have your child draw and color a pre-painting all the way to the edges of the paper. It gives her the chance to choose her colors – so that you know which paint colors to buy and when painting commences, these decisions have already been made. Be sure to choose a pleasing color for the background. An unspoken rule in painting is that the naked canvas shouldn’t show at all. When we are short on time, I just pencil the color choices onto my child’s outline drawing.


  1. Use carbon paper to transfer your child’s drawing to the canvas.

Center the drawing over the canvas, then slip the carbon paper (carbon side down) between the drawing and the canvas. Use a sharp pencil to trace the main shapes of the drawing. When you remove the drawing and carbon paper – voila! There’s the canvas prepped for paint.


  1. Prepare the art area

Dress for painting and protect the painting surface. Set out the brushes. Fill a cup or jar half-full of tap water (to prevent a major washout if the cup is accidentally tipped) and place a folded paper towel next to the cup. Plug in a hair drier a little distance from the painting area. Pour a little puddle of the first color of paint onto a paper plate. Start with just a little because it’s easy to pour more paint, but very difficult to get unused paint back into the container. Just describing this makes me want to start a painting!


Stay tuned for Part Two – Let the painting begin…..


1 47 48 49 50 51 52 53 68